This article clones the two most immersive interactive modules from the moeru.ai landing page: dot grid physics interaction and 3D tag Verlet elastic rope system. It does not cover the variable font pressure animation or GitHub member avatar loading.
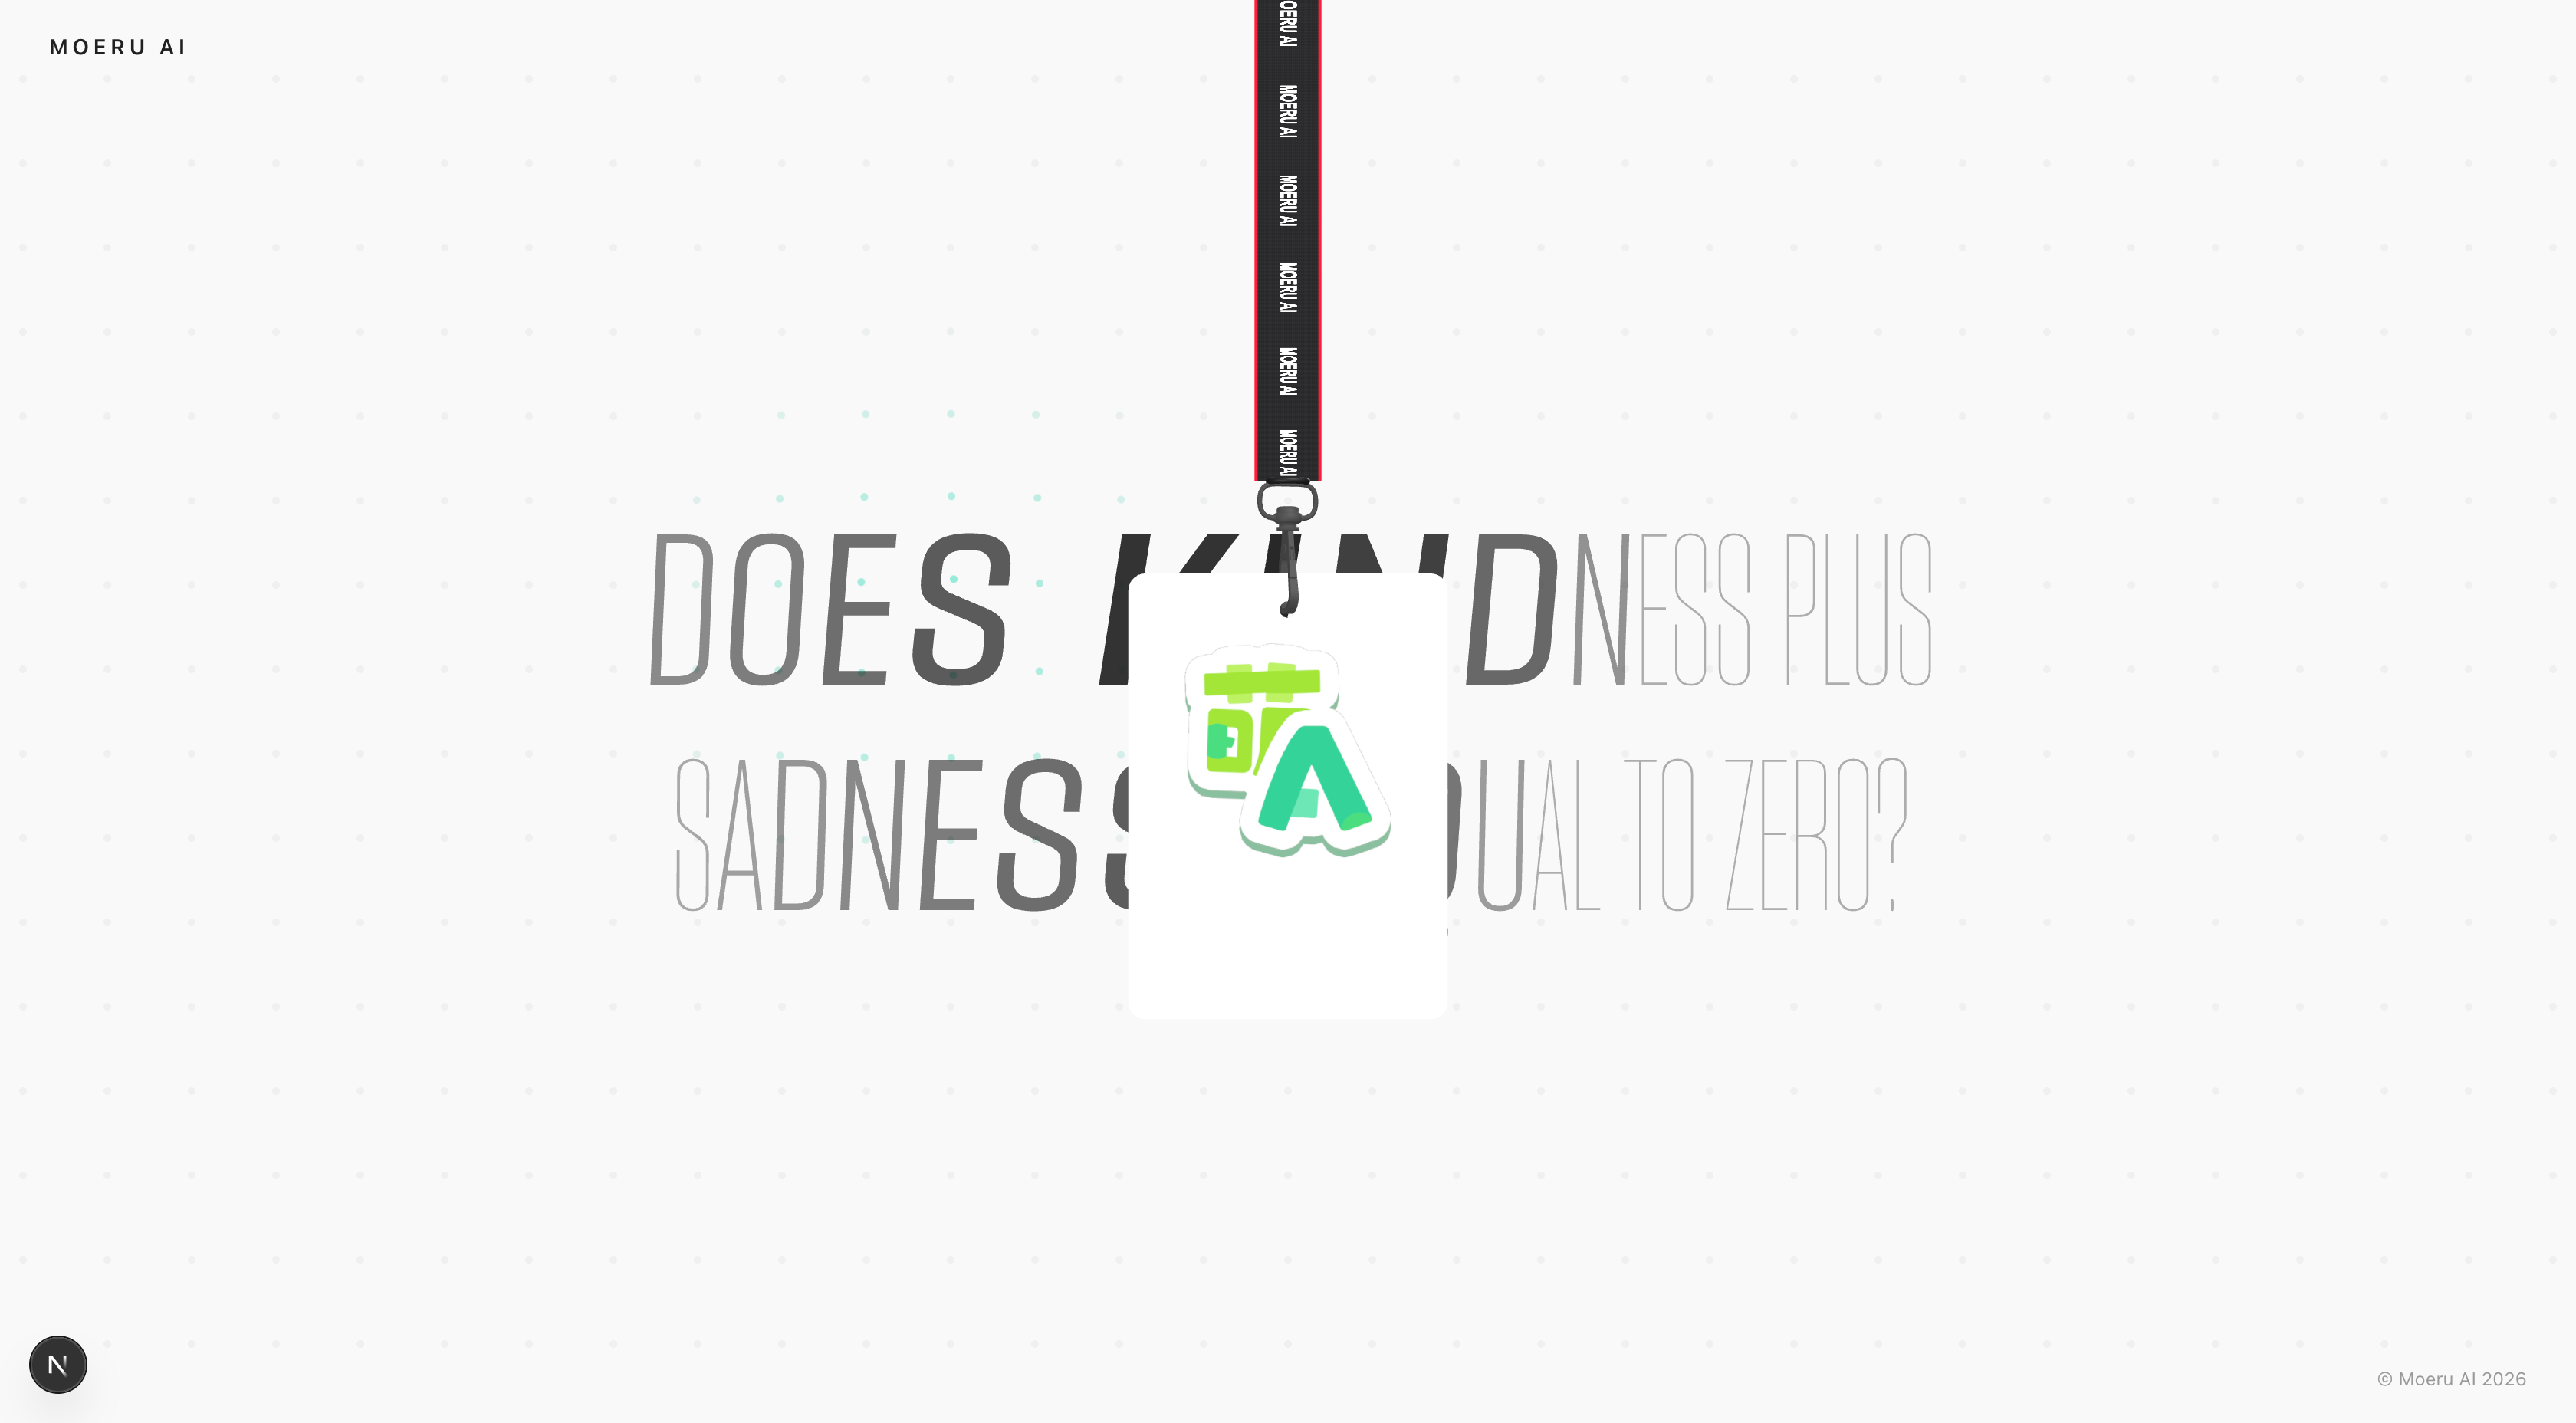
01 Overall Architecture & Tech Choices
The original site is a single-page immersive landing page whose core interactions consist of 4 modules. This article focuses on two of them:
| Module | Effect | Key Technology |
|---|---|---|
| Dot Grid | Mouse repulsion + velocity inertia + click shockwave | Distance decay + RGB color interpolation |
| 3D Tag | Verlet rope + mouse drag + elastic bounce | Three.js + Verlet integration + distance constraints |
Trade-offs in approach selection: The original site’s 3D tag uses React Three Fiber + Rapier physics engine (Rust WASM), which delivers the best results but introduces the React runtime and ~300KB+ of WASM. This article chooses native Three.js + Verlet integration for custom physics, for the following reasons:
- Controllable code size (~80 lines for core physics)
- No extra dependencies — runs as a single file
- Verlet is naturally suited for ropes/cloth and other soft bodies, with intuitive parameters
02 Quick Knowledge Map
Before diving in, here’s a “knowledge map” — each module will only use parts of it:
requestAnimationFrame(rAF): A per-frame callback synchronized with the browser refresh rate; the entry point for all smooth animations- Linear interpolation (lerp):
current += (target - current) * t— the core formula behind all “smooth chase” effects - 2D vectors & trigonometry: Distance via
Math.hypot(dx, dy), angle viaMath.atan2(dy, dx) - Three.js basics: The five essentials — Scene / Camera / Renderer / Light / Mesh
- Verlet integration: Uses “current position − previous frame position” instead of velocity, combined with constraint solving — a standard approach for rope/cloth simulation
Raycaster: Converts 2D screen mouse coordinates into a 3D ray for picking and draggingCanvasTexture: Uses a 2D Canvas to draw textures in real time, then feeds them to Three.js materials
03 Dot Grid Physics Interaction
Target effect: A full-screen layer of small gray dots that get pushed away and transition to cyan-green as the mouse approaches; fast swipes produce trailing inertia; clicks generate expanding ring-shaped shockwaves.
Batch Dot Generation & Flex Layout
Manually calculating each dot’s position is tedious. By using CSS flex with flex-wrap + gap, all dots are placed in a container that automatically wraps and arranges them — the browser calculates the positions for us. The only thing we need at generation time is the total count = ceil(width/gap) * ceil(height/gap).
/**
 * Generate full-screen dots based on viewport size
 * @param {number} gap - Dot spacing (pixels)
 */
function createDots(gap) {
  const cols = Math.ceil(window.innerWidth / gap);
  const rows = Math.ceil(window.innerHeight / gap);
  const dots = [];

  for (let i = 0; i < cols * rows; i++) {
    const dot = document.createElement('div');
    dot.className = 'dot';
    container.appendChild(dot);

    dots.push({
      el: dot,
      originX: 0,     /* filled via getBoundingClientRect after flex layout */
      originY: 0,
      color: { r: 240, g: 240, b: 240 }   /* current color (gray→cyan-green lerp) */
    });
  }

  /* After flex layout completes, cache the center coordinates of each dot */
  requestAnimationFrame(() => {
    dots.forEach(d => {
      const rect = d.el.getBoundingClientRect();
      d.originX = rect.left + rect.width / 2;
      d.originY = rect.top + rect.height / 2;
    });
  });

  return dots;
}
Three Force Sources: Static Repulsion, Velocity Inertia, Shockwave
Each dot must sum three forces every frame.
Force 1: Mouse static repulsion — The closer the mouse, the stronger the push, directed from the mouse toward the dot:
const dx = dot.originX - mouseX;      /* vector from mouse to dot */
const dy = dot.originY - mouseY;
const dist = Math.sqrt(dx * dx + dy * dy);

if (dist < proximity) {               /* proximity=200 pixels */
  const force = 1 - dist / proximity; /* 0~1 linear decay */
  const angle = Math.atan2(dy, dx);   /* repulsion direction */
  offsetX += Math.cos(angle) * maxPush * force;  /* maxPush=5 */
  offsetY += Math.sin(angle) * maxPush * force;
  colorForce = Math.max(colorForce, force);
}
Force 2: Mouse velocity inertia — Fast mouse movement applies additional push to dots in a wider range, creating a “trailing” feel:
/* Calculate instantaneous mouse speed, normalized to 0~1 */
const speed = Math.sqrt(
  Math.pow(targetMouseX - prevMouseX, 2) +
  Math.pow(targetMouseY - prevMouseY, 2)
);
const speedFactor = Math.min(speed / speedTrigger, 1); /* speedTrigger=80 */

if (speedFactor > 0.2 && dist < proximity * 1.6) {
  const vForce = (1 - dist / (proximity * 1.6)) * speedFactor;
  offsetX += Math.cos(angle) * maxPush * 0.6 * vForce;
  offsetY += Math.sin(angle) * maxPush * 0.6 * vForce;
  colorForce = Math.max(colorForce, vForce * 0.8);
}
Force 3: Click shockwave ring expansion — Each shockwave object records a birth timestamp; each frame the wavefront radius is waveRadius = radius * age. Only dots whose distance falls within the wave band [waveRadius - 75, waveRadius + 75] are pushed away, simulating a water ripple ring.
/* Listen for clicks: create shockwave object, lives for 0.85 seconds */
document.addEventListener('click', (e) => {
  shocks.push({
    x: e.clientX,
    y: e.clientY,
    time: performance.now(),
    radius: 250,     /* maximum expansion radius */
    strength: 45     /* maximum push force */
  });
});

/* Process shockwaves each frame */
shocks.forEach((shock, idx) => {
  const age = (now - shock.time) / 1000;
  if (age > 0.85) { shocks.splice(idx, 1); return; }

  const sdx = dot.originX - shock.x;
  const sdy = dot.originY - shock.y;
  const sdist = Math.sqrt(sdx * sdx + sdy * sdy);
  const waveRadius = shock.radius * age;
  const waveWidth = 75;

  /* Only dots within ±75px of the wavefront are pushed away */
  if (sdist < waveRadius + waveWidth &&
      sdist > Math.max(0, waveRadius - waveWidth)) {
    const sForce = (1 - age) *
      (1 - Math.abs(sdist - waveRadius) / waveWidth);
    const sAngle = Math.atan2(sdy, sdx);
    offsetX += Math.cos(sAngle) * shock.strength * sForce;
    offsetY += Math.sin(sAngle) * shock.strength * sForce;
    colorForce = Math.max(colorForce, sForce);
  }
});
Color Interpolation: Double Lerp to Avoid Jumps
If you directly write force into rgb(), the color will jump the moment the mouse moves. Instead, a double lerp is used: first calculate the target color, then use a coefficient of 0.12 to let the current color gradually chase the target color.
/* Base gray #f0f0f0 → active cyan-green #86ead4 */
const baseColor  = { r: 240, g: 240, b: 240 };
const activeColor = { r: 134, g: 234, b: 212 };

const targetR = baseColor.r + (activeColor.r - baseColor.r) * colorForce;
const targetG = baseColor.g + (activeColor.g - baseColor.g) * colorForce;
const targetB = baseColor.b + (activeColor.b - baseColor.b) * colorForce;

dot.color.r += (targetR - dot.color.r) * 0.12;   /* another lerp for smoothing */
dot.color.g += (targetG - dot.color.g) * 0.12;
dot.color.b += (targetB - dot.color.b) * 0.12;
Performance Optimization: GPU Compositing Layers
With 50px spacing across the full screen, there are roughly 600+ dots, each needing to update transform and backgroundColor every frame. Two optimizations:
will-change: transform, background-colorhints the browser to create a compositing layer for each dot- Using
translate3dinstead oftranslateforces GPU compositing
.dot {
  width: 5px;
  height: 5px;
  border-radius: 50%;
  background-color: #f0f0f0;
  will-change: transform, background-color;   /* hint browser to enable GPU optimization */
}
Key Design Trade-offs
| Parameter | Value | Reason |
|---|---|---|
Max push maxPush | 5px | The dot grid is a background element; excessive displacement distracts from the main content |
Shockwave strength | 45px | An order of magnitude larger than static push, giving clicks a noticeable “burst” feel |
| Shockwave lifespan | 0.85s | Too short to see expansion, too long and it overlaps with the next one |
| Color | Gray #f0f0f0 → Cyan-green #86ead4 | Large hue difference but both low saturation, fitting a “restrained aesthetic” |
04 3D Elastic Tag Verlet Physics System
Target effect: A tag hangs from the top of the viewport, swinging naturally under gravity; the mouse can grab and drag the card, which bounces back elastically when released; the strap is a realistic woven band with red edges and printed text.
Mass-Spring Chain Model & Approach Selection
The strap is essentially a “non-stretchable flexible rope.” It is discretized into 25 mass points, connected by rigid constraints, with the top fixed and the card hanging at the end.
Anchor(fixed) ─── Node1 ─── Node2 ─── ... ─── Node24 ─── [Tag]
Why Verlet instead of Euler integration? Euler integration requires explicitly storing velocity, which easily diverges and explodes under multi-segment rope constraints. Verlet implicitly expresses velocity as pos - prev, combined with multiple constraint iterations — it’s naturally stable and is the industry standard for rope/cloth simulation.
Scene Initialization & Three-Point Lighting
const scene = new THREE.Scene();

/* PerspectiveCamera(fov, aspect, near, far)
 * fov=20° — the perspective effect makes the tag appear small */
const camera = new THREE.PerspectiveCamera(
  20,
  window.innerWidth / window.innerHeight,
  0.1,
  100
);
camera.position.set(0, 0, 30);

/* WebGLRenderer: transparent background, revealing the dot grid below */
const renderer = new THREE.WebGLRenderer({
  canvas,
  antialias: true,
  alpha: true
});
renderer.setPixelRatio(Math.min(window.devicePixelRatio, isMobile ? 1.5 : 2));
renderer.outputEncoding = THREE.sRGBEncoding;

/* Three-point lighting: ambient + key + fill + rim */
scene.add(new THREE.AmbientLight(0xffffff, Math.PI));
const keyLight = new THREE.DirectionalLight(0xffffff, 0.8);
keyLight.position.set(3, 5, 5);    scene.add(keyLight);
const fillLight = new THREE.DirectionalLight(0xffffff, 0.3);
fillLight.position.set(-2, -1, 3); scene.add(fillLight);
const rimLight  = new THREE.DirectionalLight(0xffffff, 0.2);
rimLight.position.set(1, 1, -3);   scene.add(rimLight);
Physics Parameters & Node Initialization
const CHAIN_NODES  = 25;     /* chain node count: higher = more flexible, lower performance */
const SEGMENT_REST = 0.14;   /* resting distance between adjacent nodes */
const GRAVITY      = -40;    /* negative = downward (Three.js Y-axis points up) */
const DAMPING      = 0.97;   /* damping: 3% velocity decay per frame */
const ITERATIONS   = 8;      /* constraint iteration count: more = stiffer */
const FIXED_DT     = isMobile ? 1/30 : 1/60;  /* fixed time step */

const anchorPos = new THREE.Vector3(0, 5.4, 0);  /* top fixed anchor point */

/* Initial elevation angle 52°, letting the chain "hang naturally" from the upper right off-screen */
const initAngle = 52 * (Math.PI / 180);

const nodes = [];
for (let i = 0; i < CHAIN_NODES; i++) {
  const dist = i * SEGMENT_REST;
  nodes.push({
    pos:  new THREE.Vector3(
      anchorPos.x + dist * Math.sin(initAngle),
      anchorPos.y + dist * Math.cos(initAngle),
      0
    ),
    prev: new THREE.Vector3(0, 0, 0)   /* Verlet essential: previous frame position */
  });
}
Design trade-off:
GRAVITY = -40is much larger than real gravity (9.8) because the 3D scene scale is reduced — a larger gravity value is needed for it to “look natural.”
Verlet Integration & Constraint Solving Core Loop
This is the core of the entire system. Each frame does three things: Verlet integration → drag handling → distance constraint iterations.
function physicsStep() {
  if (!isLoaded) {
    nodes[0].pos.copy(anchorPos);
    return;
  }

  /* ① Chain Verlet integration: current velocity = pos - prev */
  for (let i = 1; i < CHAIN_NODES; i++) {
    const n = nodes[i];
    const vx = (n.pos.x - n.prev.x) * DAMPING;   /* damped velocity */
    const vy = (n.pos.y - n.prev.y) * DAMPING;
    const vz = (n.pos.z - n.prev.z) * DAMPING;
    n.prev.set(n.pos.x, n.pos.y, n.pos.z);       /* save previous frame */
    n.pos.x += vx;
    n.pos.y += vy + GRAVITY * FIXED_DT * FIXED_DT;  /* displacement += v*dt + 0.5*g*dt² */
    n.pos.z += vz;
  }

  const lastNode = nodes[CHAIN_NODES - 1];

  /* ② While dragging: lerp the chain end toward the mouse target */
  if (isDragging) {
    lastNode.pos.lerp(dragTarget, 0.35);
  }

  /* ③ Distance constraint solving: iterate 10 times to keep adjacent nodes at SEGMENT_REST */
  for (let iter = 0; iter < 10; iter++) {
    nodes[0].pos.copy(anchorPos);                 /* anchor stays fixed */
    for (let i = 0; i < CHAIN_NODES - 1; i++) {
      const a = nodes[i], b = nodes[i + 1];
      const dx = b.pos.x - a.pos.x;
      const dy = b.pos.y - a.pos.y;
      const dz = b.pos.z - a.pos.z;
      const dist = Math.sqrt(dx*dx + dy*dy + dz*dz);
      if (dist < 1e-6) continue;                  /* prevent division by zero */
      const diff = (dist - SEGMENT_REST) / dist;  /* error ratio */
      const mx = dx * 0.5 * diff;                 /* each node absorbs half */
      const my = dy * 0.5 * diff;
      const mz = dz * 0.5 * diff;
      if (i > 0) {                                /* skip anchor */
        a.pos.x += mx; a.pos.y += my; a.pos.z += mz;
      }
      b.pos.x -= mx; b.pos.y -= my; b.pos.z -= mz;
    }
  }
}
Constraint solving principle: After Verlet integration each frame, the rope stretches indefinitely under gravity. So 8–10 distance constraint iterations are needed: check the distance between adjacent points, and if it deviates from SEGMENT_REST, pull both points back by half the error. More iterations make the rope “stiffer.”
Dynamic Strap Texture Generation
No ready-made textures exist. A <canvas> is used to draw on the fly: a dark gray base + weaving lines + red borders on top and bottom + repeated printed text, then wrapped into a CanvasTexture and fed to MeshPhysicalMaterial.
function makeStrapTexture() {
  const texCanvas = document.createElement('canvas');
  texCanvas.width = 2048;      /* U direction (along strap length) */
  texCanvas.height = 128;      /* V direction (along strap width) */
  const ctx = texCanvas.getContext('2d');

  /* ① Dark gray base color */
  ctx.fillStyle = '#111113';
  ctx.fillRect(0, 0, texCanvas.width, texCanvas.height);

  /* ② Weaving lines: draw one translucent white line every 4px */
  ctx.strokeStyle = 'rgba(255, 255, 255, 0.04)';
  ctx.lineWidth = 1;
  for (let x = 0; x < texCanvas.width; x += 4) {
    ctx.beginPath(); ctx.moveTo(x, 0);
    ctx.lineTo(x, texCanvas.height); ctx.stroke();
  }
  for (let y = 0; y < texCanvas.height; y += 4) {
    ctx.beginPath(); ctx.moveTo(0, y);
    ctx.lineTo(texCanvas.width, y); ctx.stroke();
  }

  /* ③ Top and bottom red borders */
  ctx.fillStyle = '#d90429';
  ctx.fillRect(0, 0, texCanvas.width, 6);
  ctx.fillRect(0, texCanvas.height - 6, texCanvas.width, 6);

  /* ④ Repeated printed text along the length */
  ctx.fillStyle = '#ffffff';
  ctx.font = '900 42px "Inter", "Arial", sans-serif';
  ctx.textAlign = 'center';
  ctx.textBaseline = 'middle';
  for (let cx = 120; cx < texCanvas.width; cx += 360) {
    ctx.fillText('MOERU AI', cx, texCanvas.height / 2 + 2);
  }

  const texture = new THREE.CanvasTexture(texCanvas);
  texture.wrapS = THREE.RepeatWrapping;
  texture.wrapT = THREE.ClampToEdgeWrapping;
  texture.encoding = THREE.sRGBEncoding;
  texture.anisotropy = renderer.capabilities.getMaxAnisotropy();
  return texture;
}
Ribbon Geometry: Generating a Wide Mesh from a Curve
Using Line to draw a line in 3D always results in 1px width. The solution is to generate a CatmullRomCurve3 smooth curve along the chain nodes, then at each point along the curve compute the normal, push width/2 to each side of the normal to create vertices, and stitch triangles to form a wide mesh (Ribbon).
function createStrapGeometry(curve, width, segments) {
  const points = curve.getPoints(segments);
  const vertices = [], uvs = [], indices = [];

  for (let i = 0; i < points.length; i++) {
    const p = points[i];
    const t = curve.getTangent(i / Math.max(segments, 1));
    /* Normal = tangent rotated 90° around Z axis */
    const normal = new THREE.Vector3(-t.y, t.x, 0).normalize();
    const halfW = width / 2;

    /* Push halfW on each side of the normal to get left and right vertices */
    vertices.push(
      p.x + normal.x * halfW, p.y + normal.y * halfW, p.z + normal.z * halfW,
      p.x - normal.x * halfW, p.y - normal.y * halfW, p.z - normal.z * halfW
    );

    const u = i / (points.length - 1);
    uvs.push(u, 1, u, 0);

    /* Stitch adjacent quads into two triangles */
    if (i < points.length - 1) {
      const a = i * 2, b = i * 2 + 1;
      const c = (i + 1) * 2, d = (i + 1) * 2 + 1;
      indices.push(a, c, b, b, c, d);
    }
  }

  const geometry = new THREE.BufferGeometry();
  geometry.setAttribute('position',
    new THREE.Float32BufferAttribute(vertices, 3));
  geometry.setAttribute('uv',
    new THREE.Float32BufferAttribute(uvs, 2));
  geometry.setIndex(indices);
  geometry.computeVertexNormals();
  return geometry;
}
Drag Interaction: Screen Coordinates to 3D Space Mapping
Mouse coordinates are 2D pixels; the 3D scene uses perspective projection. The mapping flow: screen pixels → NDC normalization → Raycaster ray → intersection with Z=0 plane → 3D drag target point.
function setPointerFromEvent(event) {
  const x = event.touches ? event.touches[0].clientX : event.clientX;
  const y = event.touches ? event.touches[0].clientY : event.clientY;
  /* NDC: x∈[-1,1] right is positive, y∈[-1,1] up is positive */
  pointer.x =  (x / window.innerWidth ) * 2 - 1;
  pointer.y = -(y / window.innerHeight) * 2 + 1;
}

function projectToPlane(event) {
  setPointerFromEvent(event);
  raycaster.setFromCamera(pointer, camera);
  raycaster.ray.intersectPlane(dragPlane, hitPoint);
  return hitPoint;
}

function startDrag(event) {
  setPointerFromEvent(event);
  raycaster.setFromCamera(pointer, camera);
  /* Ray first intersects with the transparent drag proxy box */
  const hits = raycaster.intersectObject(dragProxy, false);
  if (hits.length === 0) return;

  isDragging = true;
  canvas.style.cursor = 'grabbing';
  projectToPlane(event);
  dragOffset.copy(cardPos).sub(hitPoint);   /* record grab offset */
  prevDragPos.copy(cardPos);
  event.preventDefault();
}
Performance tip: Use a transparent
BoxGeometryas a drag proxy for hit detection, avoiding direct ray intersection against the complex GLB model (which is both slow and inaccurate).
Spring Bounce After Release: Simple Harmonic Motion
After release, the card can’t just stop — otherwise there’s no “inertia.” The simple harmonic motion equation accel = -ω²·sin(θ) is used to simulate spring bounce:
if (!isDragging) {
  cardAngVelZ = 0;                         /* left-right angle forced to zero */
  cardRotZ += (0 - cardRotZ) * 0.3;

  const lastVelY = lastNode.pos.y - lastNode.prev.y;
  const targetRotX = THREE.MathUtils.clamp(-lastVelY * 0.4, -0.3, 0.3);

  const OMEGA_X_SQ = 45.0;   /* angular frequency squared — larger = stiffer bounce */
  const OMEGA_Y_SQ = 20.0;

  /* Simple harmonic motion: acceleration = -ω²·sin(θ) */
  const accelX = -OMEGA_X_SQ * Math.sin(cardRotX - targetRotX);
  const accelY = -OMEGA_Y_SQ * Math.sin(cardRotY);

  cardAngVelX += accelX * FIXED_DT;
  cardAngVelY += accelY * FIXED_DT;

  /* Higher velocity → higher damping (air resistance) */
  cardAngVelX *= Math.max(0.85, 1 - (0.015 * Math.abs(cardAngVelX) + 0.01));
  cardAngVelY *= Math.max(0.85, 1 - (0.015 * Math.abs(cardAngVelY) + 0.01));

  cardRotX += cardAngVelX * FIXED_DT;
  cardRotY += cardAngVelY * FIXED_DT;
}

cardPos.copy(lastNode.pos);   /* card position locked to chain end */
05 Appendix
Key API Parameter Quick Reference
| API | Parameter | Purpose |
|---|---|---|
performance.now() | None | High-precision millisecond timestamp, used for shockwave age calculation |
Math.atan2(dy, dx) | y first, x second | Returns radians -π~π, distinguishes all four quadrants |
transform: translate3d(x,y,z) | Three pixel values | Triggers GPU compositing layer even when z=0 |
PerspectiveCamera(fov, aspect, near, far) | FOV / aspect ratio / near clip / far clip | The four essentials of a perspective camera |
Raycaster.setFromCamera(ndc, camera) | NDC 2D vector / camera | Converts screen coordinates to a ray |
CatmullRomCurve3(points) | Array of 3D points | Smooth curve through points |
CanvasTexture(canvas) | Canvas element | Converts 2D canvas to GPU texture |
MeshPhysicalMaterial | map/roughness/metalness/clearcoat | Advanced physical material |
Common Issues & Debugging Tips
| Problem | Cause | Solution |
|---|---|---|
| Physics jitter / explosion | SEGMENT_REST inconsistent with initial node spacing | Ensure both are strictly equal |
| Rope visibly stretching | Too few constraint iterations | Increase to 8–10 iterations |
| Card flickering / clipping | Z-fighting | Offset card Z by -0.02, placing it directly behind the strap |
| Low frame rate on mobile | Too many nodes | Reduce CHAIN_NODES to 15, use FIXED_DT of 1/30 |
| Dot grid lag | Too many dots | Increase gap to reduce DOM node count |
| Strap color shift | Missing HDR environment map | Increase AmbientLight intensity to compensate |
Recommended Steps for Building from Scratch
- Skeleton page: Set up two containers —
.dot-gridand.lanyard-wrapper canvas - Dot grid: First generate a static dot grid to confirm layout → add mouse static repulsion → add velocity inertia → add click shockwave
- 3D scene scaffold: Create Scene/Camera/Renderer + 3 lights, render one frame to confirm the canvas works
- Chain physics: First visualize nodes with Points or small spheres, verify Verlet falling, constraint solving, and drag following
- Strap texture & geometry: Call
makeStrapTextureto check the canvas print, then usecreateStrapGeometryto replace the spheres - Load GLB model: Confirm GLTFLoader can load it, then align the origin to the card’s top center
- Drag interaction: First implement
startDraghit detection, then writemoveDrag/endDrag, finally hook up angular velocity bounce - Responsive & performance: Limit DPR, bind resize, degrade on mobile
References: Original site moeru.ai | Clone preview deltastudio.space/demo/moeru-ai | The code in this article is a native JavaScript clone based on the original site’s effects.